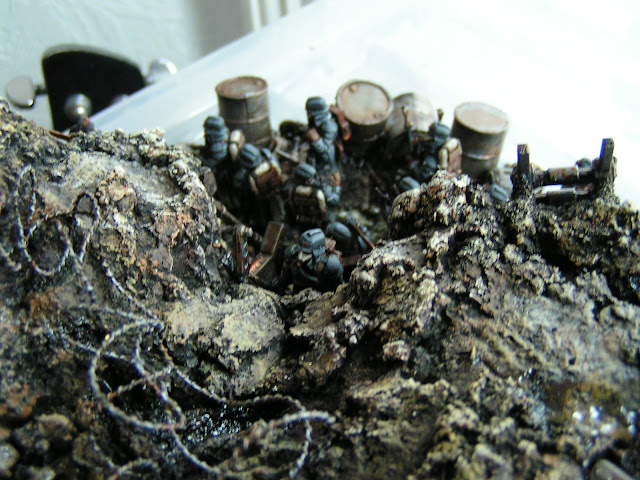
I've already written an article about my intentions when building my Before the Push Diorama, but I thought it might be interesting to look at the process I went through... with pictures.
My original concept of the commissar giving last instructions to his men had been intended to be delivered from a low stage but my mind quickly jumped to doing something in a trench. But how to do that without forcing the viewer to look down on the tops of the heads of the miniatures???
I decided to go with a cross-section of a trench and hope to God that viewers knew what it was supposed to be.
I needed a base, which caused me a lot of trouble as I couldn't find one of the fancy display bases you see in Golden Demon anywhere! In the end I found a handy cake stand which fit the bill perfectly.
I made the wall of the trench using a block of cheese insulation foam which I cut to match the edge of the cake stand. At this point I laid out the men to see how it would look (very important).
Now it looked far too rigid obviously so I cut away at the foam to blend it down into a more natural trench-top. I wanted to have a look-out post so he needed a shelf to stand on high enough to give him a view.
To give an impression of depth I thought it would be nice to have a bunker entrance. I built the entrance from balsa wood then hollowed out deep enough so that, painted black, it would look like it went somewhere.
To give the earthy texture, I add %£&"^ loads of multi-purpose filler mixed with gravel and PVA glue. I stuck razor wire in so that it went under the surface of the mud.
Then dried it under a table lamp with Wilma keeping watch.
At this stage I worked towards making it a bit more "trenchy." The walls were made from fabric that I planned to paint with metallic colours. I cut them into small enough sections to make them look like sheets of metal. I had the "mud" overlap the tops of the barriers.
Now how to suggest the opposite wall of the trench without it actually being there...?
I went with piling up some barrels. It isn't perfect. But seeing the models clearly was a higher priority than perfectly representing a trench.
And after adding a little rat amongst the barrels that was about it. It was time for painting!
The mud was done in greys and browns and I also added some water effect for puddles. I did the metals in boltgun metal with the now unavailable Flesh Wash for rust.
Finally came the trickiness. I'd painted the Death Korps of Krieg separately with Adeptus Battle Grey, black wash, then up through the greys with bestial brown webbing, inked dark then highlighted up.
My friend Joao gave me some tough love, telling me my previous Death Korps weren't as well painted as I thought they were (bastard). But he was right and I went the extra mile on these guys.
The trickiness was positioning all the men so they were realistically listening to the commissar or getting on with making preparations. This took a while and I had to flatten a couple of spots on the ground to give some of them a good support where before there had been potholes. I used sand and glue for this.
Last of all I added a stub gun to the look-out position to look like it is off its stand, ready to be clipped into position.
It seemed rather criminal to me to "waste" expensive Forge World Death Korps models on a diorama and for a while I toyed with placing them on it on bases.. or maybe dismantling it after the competition.
Now I'm glad that never happened. this is probably the best piece I've ever done. My Tyrannosaurus Rex and Alpha Level Psykers, Goliath and Golgotha come close but I think they probably lose.
Comments and feedback will be gratefully received.
Please.


No comments:
Post a Comment